Saturday, January 29, 2011

And the adventure begins


a dream come true…. a little, tiny dream, but still coming true.


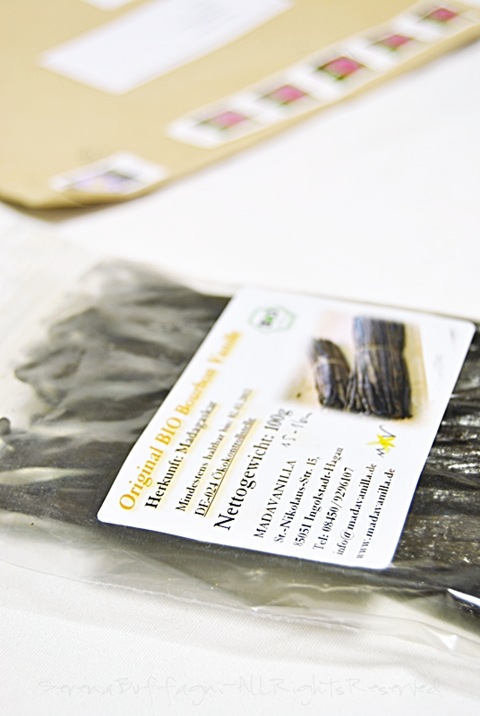
Yesterday an envelope arrived. I had been waiting for that for a long time (well actually just a week, but it contained something i had longed for for quite a long time)

env copiab

i have been “stalking” her for all this time, and she never told me or let me infer i was bothering her too much. I have to thank her if i’m holding the content of that envelope right now. Thanks Martina, for all the support and patience you’ve had.


envf

vanil copia2


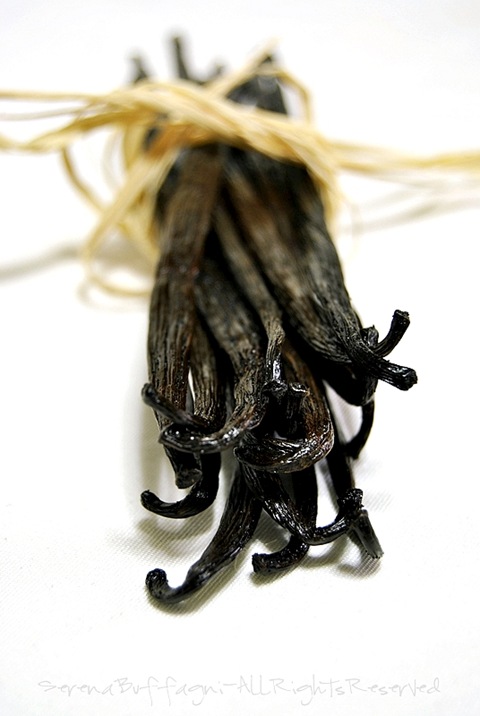
here a single pod costs 3 euros (you make the conversion, Saint Google might be of some help… i just don’t want to get it wrong and i’m likely to get it wrong ;))

that’s the reson i had never bought a vanilla pod in my life (until i bought a 2-pod packet for 5 euros last month)

Instead thanks to Martina i got to buy 100 g of vanilla pods for 15 euros (shipping costs included). Amazing!

I’m so happy now! Well what doesn’t really make me happy though is the fact that i have to wait until summer to use it! Only by then the vanilla extract will be ready to use :( Out of sight, out of mind, i’ve hidden the bottles so i won’t risk being tempted and using it too early.


vanilla extract2bf2b

Vanilla extract resources i’ve checked/found helpful: (told you i love “wasting my time” on comparing recipes and sources ;) )

- http://chocolateandzucchini.com/archives/2009/02/homemade_vanilla_extract.php

- http://www.joythebaker.com/blog/2009/06/how-to-make-vanilla-extract/

- http://www.thethriftymama.com/2010/10/homemade-vanilla-extract.html

- http://newlifeonahomestead.com/2010/10/how-to-make-homemade-vanilla-extract/

- http://simplyrecipes.com/recipes/how_to_make_vanilla_extract/

- http://userealbutter.com/2010/04/29/vanilla-extract-recipe/

- http://bossacafez.blogspot.com/2010/04/homemade-vanilla-extract.html

- http://thelittleteochew.blogspot.com/2010/05/homemade-vanilla-extract-and-vanilla.html

- http://kelseyskitchen.com/2010/12/homemade-vanilla-extract/

- http://www.avoision.com/2009/03/02/making_homemade_vanilla_extrac.php

- http://www.mybakingaddiction.com/how-to-make-homemade-vanilla-extract/


- http://aniceecannella.blogspot.com/2010/01/estratto-di-vaniglia-fatto-in-casa.html {it} – (this one calls for a sugar syrup along with alcohol and vanilla pods)

- http://www.cilieginasullatorta.it/2009/08/estratto-di-vaniglia-homemade.html {it}

Friday, January 28, 2011

A bit late… but as they say… better late than never


A long time ago i saw a recipe. It called for tofu and soy milk. Despite these, is sounded absolutely delicious, and it also looked yummy. Wait a minute, i wrote “despite”… just because i knew i was never going to get those. Well MAYBE i could have, but i really doubt about it.

Anyway, i really wanted to try it but… how could i do that?

i came up with a substitution, i asked the blogger whose recipe i wished i was able to make, and yes, she reassured me and told me that the idea i had was not bad. I forgot to say thank you, that was too rude of me. I apologize Grace. I’m thanking you now :) a bit late but better late than never :)

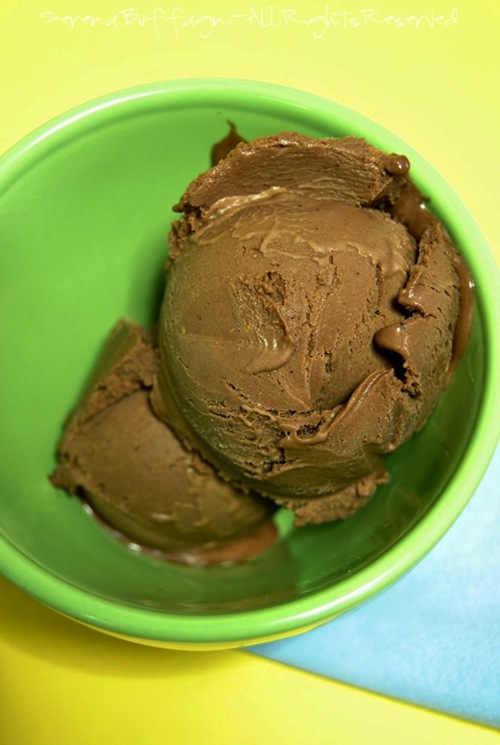
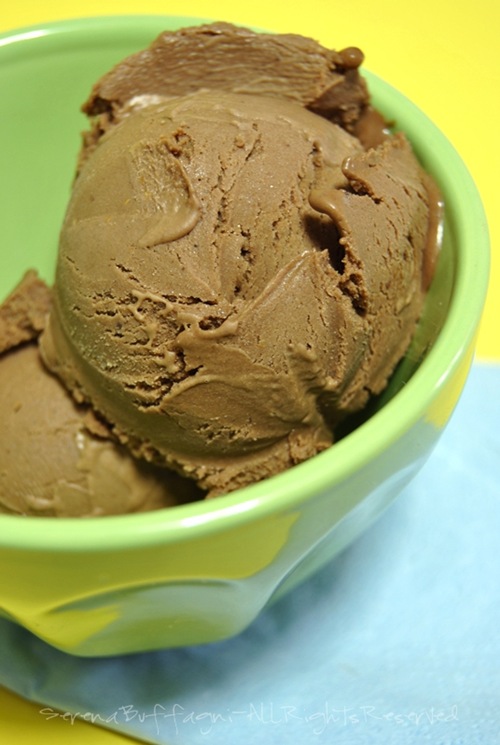
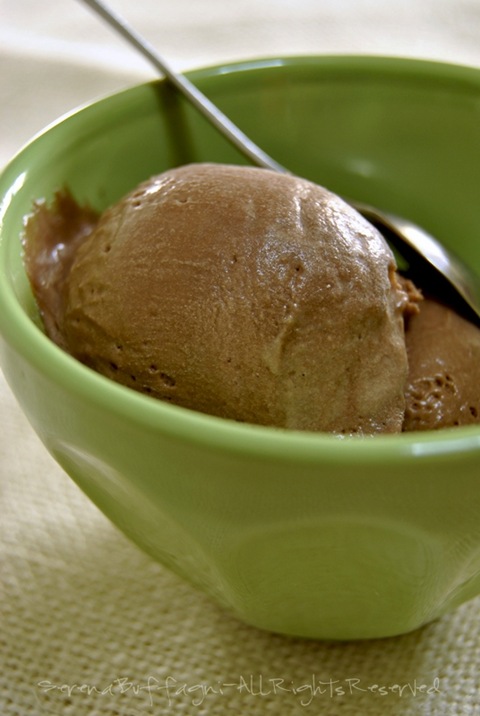
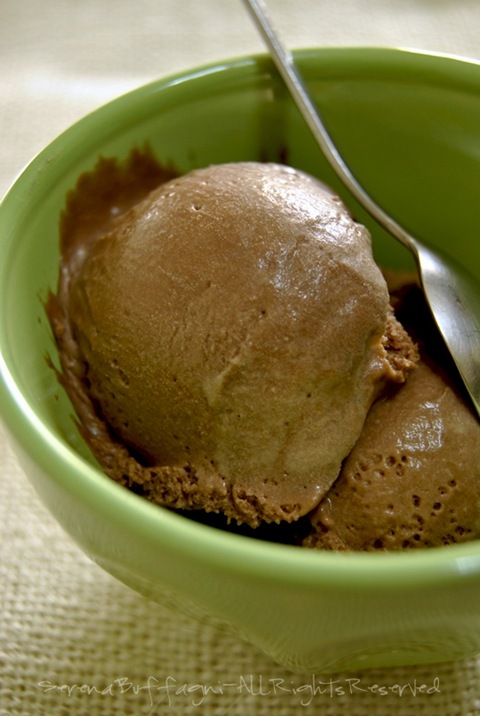
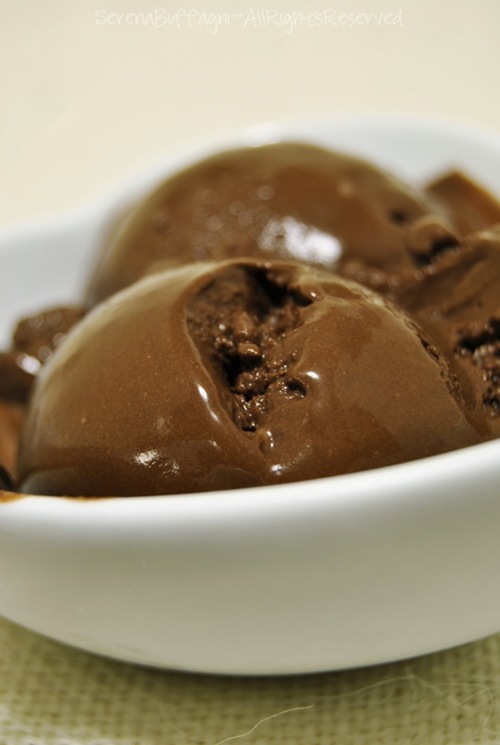
My ice cream probably isn’t exactly like Grace’s, but it’s yummy :)


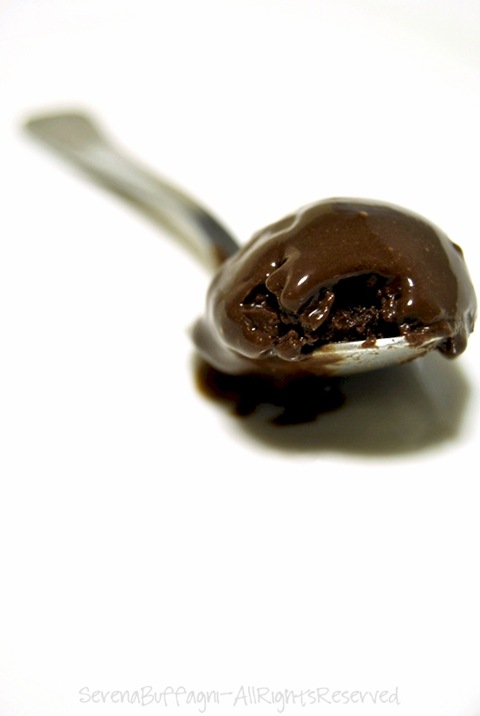
Praline Chocolate ice cream

adapted from here

(i had only 200 g of cheese so i reduced all the amounts to fit that)

pral2 copia

Ingredients:

serves 4-5


200 g philadelphia cream cheese (replacing 336 g silken tofu)

1/3 cup + 2 tbsp maple syrup

1/2 cup hazelnut praline paste (i had already some in the refrigerator-the funny thing is that i only had exactly 1/2 and luckily was enough)

1/2 cup (regular) milk

100 g chopped dark chocolate

vanillin

2 tbsp cocoa

2-3 tbsp vodka


   pral4 copia

Method:

put in a food processor the cream cheese, milk, maple syrup, praline paste, vanillin, cocoa, and blend until well combined and until all lumps disappear;

add the melted chocolate to the mixture, and vodka;

refrigerate if necessary, to get a very cold mixture;

pour into your ice cream machine and process according to the manifacturer’s instructions;

then transfer the ice cream to a freezer safe container, cover with the lid and place into the freezer, allowing it to set for at least 4 hours.


i added a little cocoa to make the colour more intense and darker, and vodka to allow the ice cream to keep soft in the freezer for a longer time, and to allow me to scoop it more easily when i take it out of the freezer.


go here to see how you can make your own hazelnut praline paste. I do the same as Grace, i just use the same amount of sugar and hazelnuts.

pral3 copia

pral5 copia

next time i’m making the peanut butter version ;D

Monday, January 24, 2011

Need for some vanilla stuff

Right then. The story goes so.

I had made to make a batch of brownies, for a round-up/contest/dunnohowtocallit. Anyway, since i’ve become the kind of person i didn’t want to become (the kind that sees the picture in their mind before even taking it), i already knew how (i hoped) i was going to serve (and shoot) my brownies. Served with ice cream on top. Well, ice cream is always ice cream, it’s delicious no matter what the taste is. But you all know (don’t you?) that vanilla ice cream and brownies are the perfect match (ok, right, each to his own taste, but…). Anyway, i wanted, needed vanilla ice cream, but didn’t happen to have some in the freezer (how could this have been possible????). So the night before, without working too much on it (i didn’t really want to spend too much time on ice cream-making, that wasn’t the purpose of the whole thing), i tried this.

I also had some yogurt that needed to be used, so i killed two birds with one stone.

Oh and yes, i almost forgot to mention it. No ice cream machine needed. Not even a mixer. You’ll see. This is super easy, i mean it.


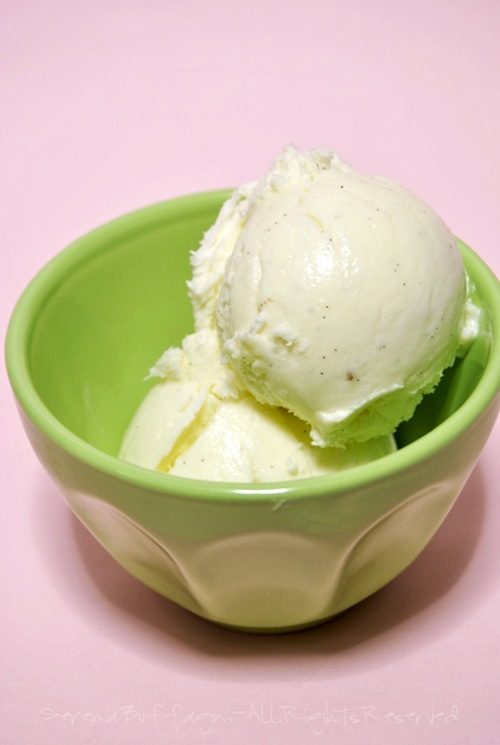
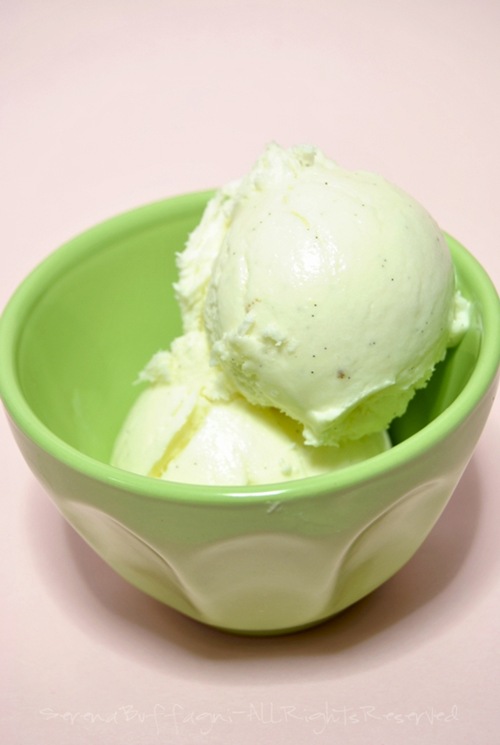
No-churn vanilla ice cream (eggless)

 image

Ingredients

serves 6


3/4 cup (150 g) granulated sugar

3 tbsp vodka

9 oz (250 g) plain or vanilla yogurt (no fat free or any other light version) – divided into two

seeds of a vanilla pod

1 scant cup (200 ml) whipping cream

6 oz (170 g) condensed milk (kept in the refrigerator until the moment it is used)


Method

place into a casserole on low heat half of the yogurt with the sugar and the vanilla seeds, stirring occasionally, until the sugar has completely dissolved into the yogurt;

allow to cool completely, then whisk in the rest of the yogurt and vodka;

make sure this mix is very cold (chill it if necessary. If it’s winter, and you don’t live in California, or anywhere else where it’s 120°F {50°C} also in winter, you can put it on your windowsill, covered with aluminum foil) before moving to the next step;

whip cream while adding condensed milk to it (do it very gingerly, almost by pouring it over cream very gingerly)

when it’s stiff and well whipped, fold this into the yogurt mixture, very gently;

very gently scraper this whipped, fluffy mixture into a freezer safe container (i used a 32 oz. emptied yogurt container)

Cover with the lid, allow to set in your freezer for a minimum of 6 hours. All you need to to at this point is scooping into a bowl and eating it.

It keeps always creamy, no matter how long you keep it in the freezer (but i’m sure it won’t last even a week).


image

enjoy it plain

syrup005


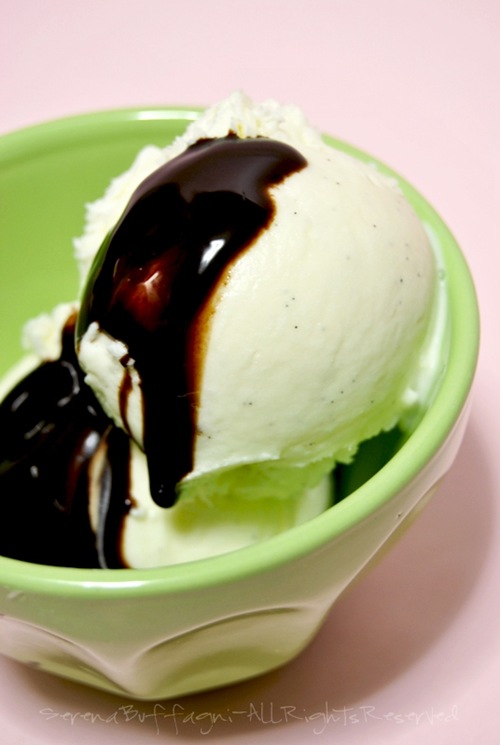
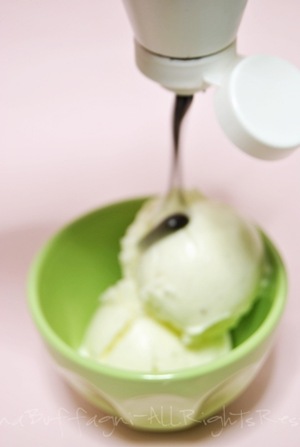
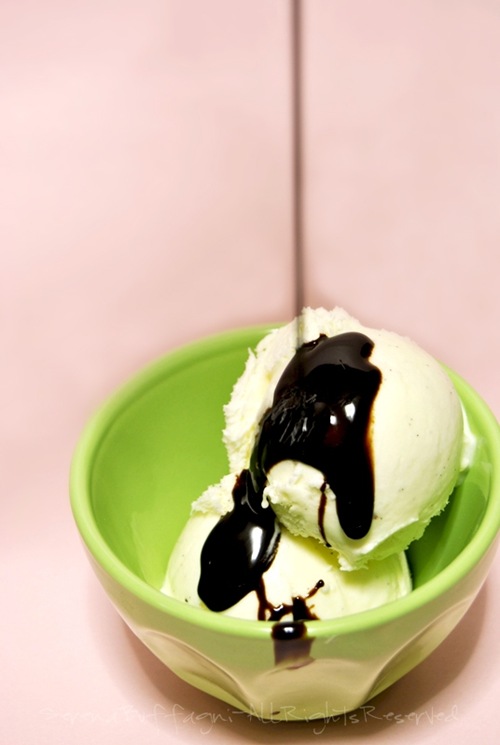
or topped with caramel sauce, fruit topping, or chocolate syrup

syrup002

Sunday, January 23, 2011

Bake at 400°F, allow to cool, grab everything,… and throw it all away!

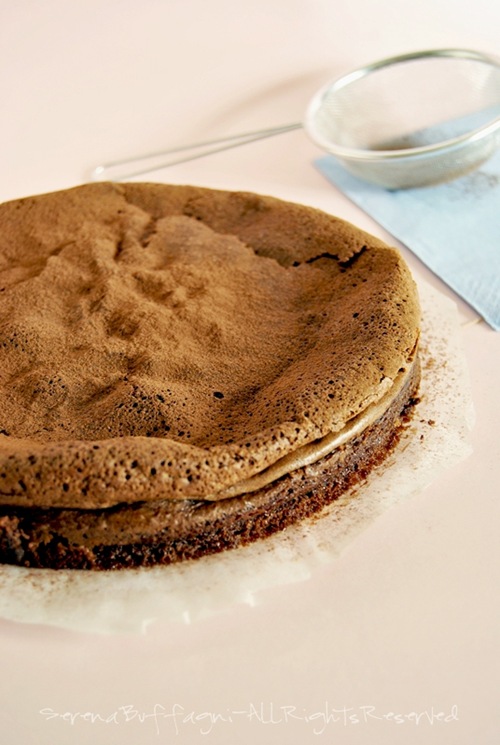
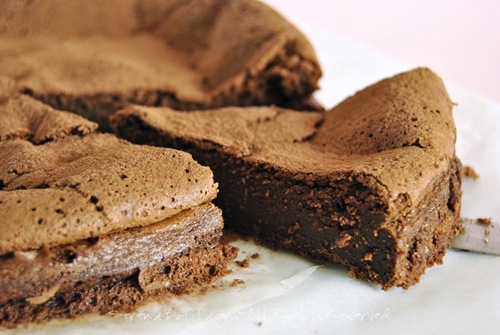
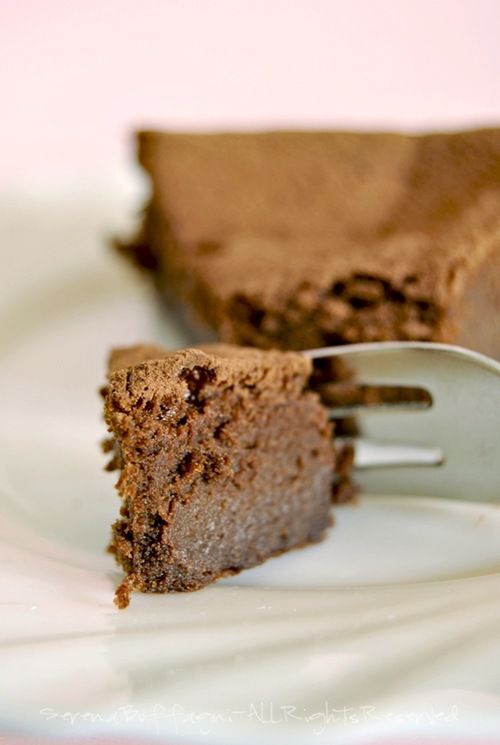
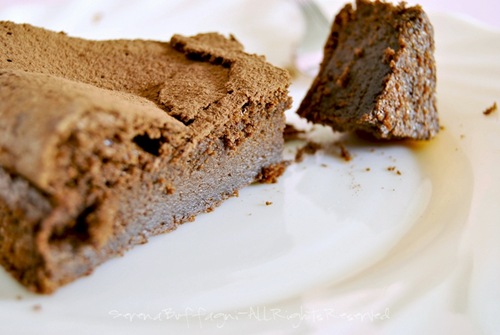
which is more or less my mood right now. I was so excited when i saw this, and i was even more when lovely Holly helped me find the recipe. I had to try it. it’s almost pure chocolate, who wouldn’t love it?

moussecake004

(i wonder why the hell i keep asking myself stupid questions, questions whose answers btw i already know, deep inside of me)

my excitement was killed hip and thigh. i’m so frustrated that i’m not even sure about posting this. i’m angry, too.

whatever


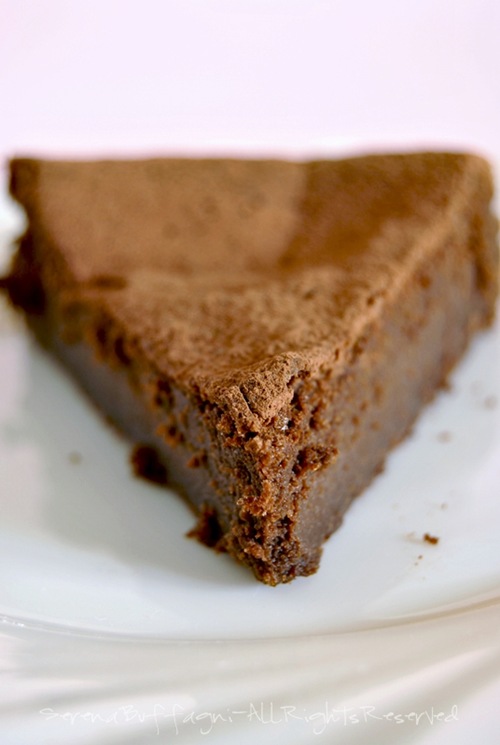
Chocolate mousse cake

adapted from here


Ingredients

for a 8-inch (20,5 cm) round pan* – serves 8


1/4 pound (115 g) dark chocolate, coarsely chopped

1/3 cup hot brewed espresso or strong brewed coffee

7 tablespoons unsalted butter, at room temperature

2/3 cup (133 g) sugar

2 pinches of salt (i used 1)

4 large eggs, separated


cocoa powder for dusting

whipped cream of vanilla ice cream to serve with

 moussecake002


Method:

(i’ll tell you how i did it)

generously butter the sides of a cake ring, then place it on a baking sheet lined with parchment paper (tip: to prevent parchment paper from moving or slipping, slightly butter the corners of the baking sheet, or “draw” a sort of internal the perimeter 2 inches away from the edge of the baking sheet, then press the paper against the baking sheet, so the little butter you used will act as glue and allow the paper to stay where it’s supposed to) ; preheat oven to 400°F (200°C);

in a microwave safe bowl put chocolate, and allow to melt (it’ll take it around 90 seconds to melt, stop the microwave every 30 seconds and stir the chocolate to keep it from burning);

meanwhile prepare the coffee (i made it with a machine – of course mine is way more essential and simple, and the amount was about one scant coffee cup – it equaled 3-4 coffees of the kind you get in italian cafees, which, let’s say it, is quite an invisible amount of coffee – just complaining, i’m stopping, right);

when the chocolate is completely melted add the hot coffee and then butter, tablespoon by tablespoon, stirring well to incorporate it evenly;

gently whisk in sugar, a pinch of salt, and the egg yolks, one at a time;

in a separate bowl whisk the egg whites (the should be firm but still glossy);

Very gingerly whisk about ¼ of the egg whites into the chocolate mixture. Switch to a rubber spatula, and gently fold in the rest of the whites.

Scrape a generous third of the mixture into the buttered ring on the baking sheet. Cover and refrigerate the remaining mousse.

Bake the mousse in the ring for 15 minutes, at which point it will be puffed. Transfer the baking sheet to a cooling rack, and allow the cake to cool to room temperature. There will be a dip in the center of it. Place the cake, still on the baking sheet, in the refrigerator. (opss i skipped this, i actually didn’t have time – and my cake didn’t actually have any dip in the center either – it was right at this stage that the “omg i’m sure i’ve done something wrong and this cake will never ever turn out as it’s supposed to” feeling started. I tried to be confident – cakes can perceive your fear – and went on as if nothing {wrong} had happened)


Now you have a choice:

TO SERVE BAKED AND CHILLED (recommended – and actually my only option – can’t even stand the thought of eating raw eggs):

Chill the base of the cake for at least an hour (as i said above, skipped).

Preheat the oven to 400°F. Scrape the chilled mousse onto the chilled base (still on the baking sheet). Bake for 30 minutes or until top is puffed and dry (30 minutes were fine, maybe i could even have baked it for a little less time – the surface showed some little “burnt” spots). It will crack, and a knife inserted inside a crack will come out almost dry.

Transfer the baking sheet to a cooling rack, and cool to room temperature. Chill for at least four hours or overnight. Remove the sides of the springform pan (already done, before placing it into the refrigerator). (Run a blunt knife around the edgesi did so - or warm the pan with a hairdryer – mmm no… hairdryer should stay where they are – bathroom zone.) Carefully transfer the cake to a serving plate, and dust with cocoa. If you think there’s nothing wrong about it, well then do serve with whipped cream or ice cream. I… let’s say i wished i could save myself some calories – and i was too lazy to get down to the basement to get the spray cream.


or you can:

SERVE BAKED AND WARM: Bake as for "baked and chilled" (above). After you have transferred the baking sheet, with the cake on it, to a cooling rack, wait five minutes, then run a blunt knife around the edges of the cake and remove the sides of the pan. The cake will sink, so just let it settle for another five minutes. Transfer to a serving platter, and dust with cocoa. Serve with whipped cream or ice cream if desired.

SERVE CHILLED: Let the base of the cake chill thoroughly. Scrape the remaining mousse over the base. Cover and refrigerate at least six hours, or overnight.

Transfer the springform pan to a serving plate and remove the ring. (Run a knife around the edges or warm the pan with a hairdryer.) Dust with cocoa. Serve with whipped cream or ice cream.

moussecake005

moussecake003     moussecake006

moussecake007


enjoy (hopefully more than people did here)

i was so extremely happy with succeding in making the cake! (i had really thought it would have been a complete disaster), but as i said, now i’m just feeling like grabbing the plate and “gently fold it into the… rubbish”… :(


S.


Notes:

the recipe didn’t actually call for a cake ring. Originally it called for a springform pan without its bottom. But i didn’t have a pan of the required size, and i had read something about “not quite right” sizes and the resulting cakes. I really didn’t want my cake to be as thick as a crepe, so i wanted something with the right diameter. Seems like the cake ring worked just fine. It really is a helpful tool, because this way you always have “the right-sized pan”. So i highly recommend buying one if you have the chance to.

Saturday, January 22, 2011

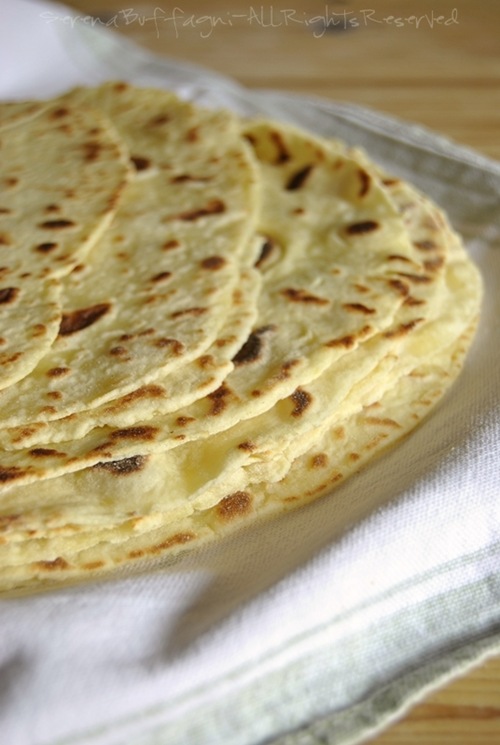
My first lefse experience – apparently not as bad as i had thought :D

Someone told me that i am my own worst critic. I think she was right. No matter if what i do is good or bad, i always think that it’s bad, and i always will.

Some days ago (i wonder how i was able to not see it before) i stumbled upon this. Then i went here, and inevitably landed here.

Mmmh… Lefse. {They actually reminded me of our piadina romagnola.}

I was immediately interested in them, and started searching for “THE” recipe. Well it sounds easy if you put it that way.

The good and the bad about the internet is VARIETY. On the internet not only you can find EVERYTHING, but you can also find the ENDLESS VERSIONS OF THAT “EVERYTHING”. You following me?

I’m sure you have already experienced that. At least i have, for sure.

When i want to find the recipe for something, i cannot trust the first recipe i find. How can you be sure that that source is reliable? How can you be sure that someone has really tried that, and hasn’t just copied and pasted that recipe from somewhere else (only god know where from)?

So well my usual approach to recipe searching is: find as many recipes as you are able to find, and then compare them all.

It always takes me quite a lot of time, but pays off almost always eventually. {i’ll hark back to that soon, i’ll write a post only about this matter}

So well, after looking at 20 different recipes (at least), comparing them, thinking a lot, and so on, i chose the recipe.

Today the pictures really do suck, more than usual, i’d say :D i didn’t think i was going to post this, but after the kind, helpful, lovely Erica reassured me about the result i got, well now i’m posting the recipe+(horribile) photos of my very first Lefse, which wasn’t so bad after all then :D


lefse001

Lefse – Norwegian flatbread {here to read more}

makes 8-10 9-inch round lefse (lefses? do you add the –s for the plural?)


adapted from here (with wonderful photos and explanations)

(my adaptations in brackets, as always)


1 {910 g} pound potatoes

1/2 {113 ml} cup whipping cream (omitted: my dough was already “too wet”)

1/2 stick {60g} butter

2 tsp sugar

1 tsp salt

1 1/2 cups flour


Method:

peel, quarter and boil in salted water potatoes, until you can easily pierce them with a fork;

drain well;

rice the potatoes quickly, put them back into the pot where you boiled them, add bits of butter and allow to melt completely, stirring well;

allow to cool completely;

add the rest of the ingredients (cream, salt, sugar, flour);

mix at first with a spoon, then knead well by hand on the counter for 10 minutes;

portion out the dough, form it into rounded patties and allow these to set for 5 minutes before rolling them out, really thin, on a very well floured surface (i rolled the dough out and then cut the form of a round using a reverse flate plate, then i rolled the dough just a little bit to allow the rolled out dough to have an even surface and thickness);

cook on the preheated proper griddle or in a skillet (like i did), it has to be really hot when you start cooking your lefse;

cook on one side until bubbles form, and then flip and allow to cook on the other side too;

stuck cooked lefse on a clean towel and allow to cool.


{it takes you around 2 hours to have your lefse ready; it can also be folded – half or quarters – and frozen for up to 6 months}

lefse003

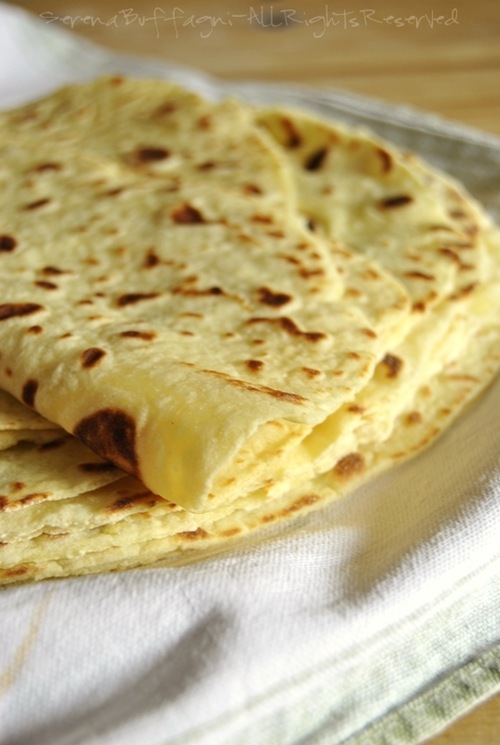
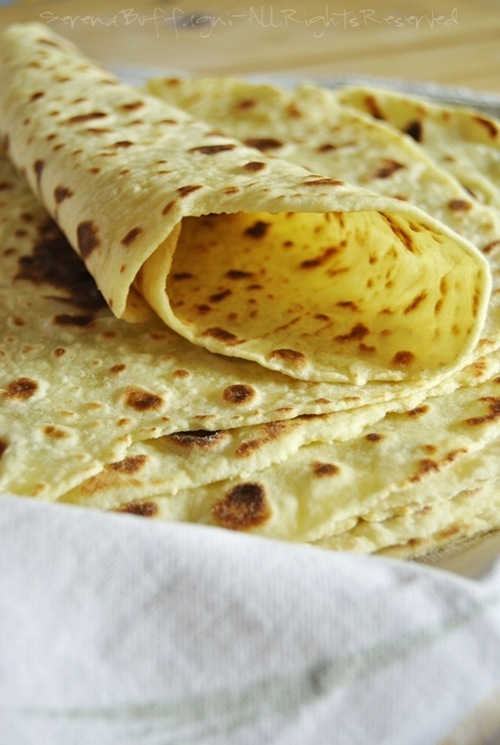
my lefse was very easy pliable and foldable, which scared me. What went wrong????

Erica tells me it’s ok if lefse has a soft consistency (i’d define it “crepe-like”). {I had expected lefse to be… “crunchier” and “harder” (drier). But that’s not how it should be.}

 lefse002

see? they’re perfect for making wraps-like stuff, you should fill them, roll, and eat.


I read, among other things, that people in Norway are also used to eating it with butter, sugar and cinnamon for breakfast.

Here we ate it with ham, salami, soft cheese (mine was filled with a mix of oven baked vegetables – i’m almost a vegetarian). I actually wanted to stuff it with Nutella… but.. next time ;)


Too bad (too bad) i haven’t the proper stuff to make them :( like the right pin, that gives the texture to the dough, the stick, or the griddle :( maybe some day, if someone i know goes to Norway, i’ll ask them to bring me the lefse equipment ;)


to transfer the rounds from the counter to the skillet i used a wonderful knife with a long, narrow, flat blade (something like that) that happened to be perfect for carrying out this operation! lol


tip:

make sure you cut your fingernails before making lafse :D or you’ll risk piercing the rounds of rolled out dough!

(anyway, the dough was much more resistant than i expected! it almost never tore!)


of course any suggestion for improving my lefse-making skills is more than welcome! :)

Friday, January 21, 2011

DIH – Do It Homemade – it’s better, it’s cheaper… and way more fun!

Well i am a bit disappointed. Guess what is not fun at all? It’s not fun at all when, in addition to your regular breakfast, you eat two huge scoops of ice cream+syrup, just to be able to take some good pictures of the latter and… the pictures turn out to be horrible, and you get the feeling that you’re nearly going to puke because you’ve eaten too much.

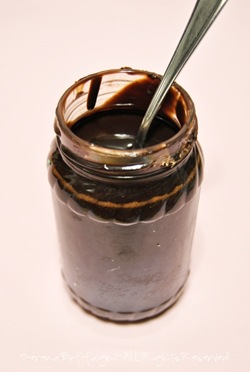
Leaving aside all this (boring, for you, i’m sure) stuff, what i really mean to say is: the picture do not do justice to the subject of this post, this wonderful chocolate syrup.

In fact, i didn’t mean to post it now, not one bit. I really wanted to take a great pic of it first, one that could make you understand how good, delicious, yummy it is (i guess you’ll have to try it yourselves, at this poin), and only afterwards i would have posted the whole thing.

But i have to. Because i want to give thanks for this recipe to the blogger i “stole” the recipe from, and i had to have evidence of the fact that i had actually tried it, didn’t i? ;)


so, thanks Becky :) it tastes wonderful :)


syrup008

Chocolate syrup

adapted from here


makes almost 2 9-oz. jars (if i had known about that, i probably would have halved the recipe :) i eat that alone, and it’s a bit too much for me – anyway, Becky said it keeps more or less 1 month in the refrigerator – if you don’t eat the hole batch the day after the day you’ve made it – not recommended if you’e trying to stay fit :D like me)


Ingredients: (my adaptations in brackets)

1 cup unsweetened cocoa powder

1 1/2 cups granulated sugar (flavored with vanilla – just put a pod - whose seeds you’ve already used - into a jar, and cover with granulated sugar – allow the flavor of the vanilla pod to be transferred to the sugar – you actually forget about the jar for a month or two – make sure to shake the jar every now and then cause the sugar will tend to form one single block, due to humidity)

1 cup hot water

1/8 tsp salt

2 tbsp light corn syrup (it’s not available where i live, so i used the same amount of glucose syrup/liquid glucose instead – well i meant to use the same amount, but since i only had 1 1/2 tbsp, i used that)

1 tsp vanilla extract (1 sachet of vanillin – i know it’s not the same at all, but you have to use what you have – hopefully i’m making my own vanilla extract soon, keep your fingers crossed for me people ;) )


Mehod:

place the dry ingredients in a casserole, gradually add the water stirring constantly (i do so to prevent lumps to form);

add the syrup, bring to a boil over medium heat, stirring constantly, and cook for 3 minutes;

remove from heat, add vanilla, mix well, allow to cool completely and trasfer to a proper container (i used an empty bottle which once had contained store bought syrup).

Store in refrigerator, for up to a month.

(makes 1 3/4 cups syrup)


before:

syrup006

…and after the “chocolate syrup treatment”


syrup007 on my delicious, homemade, no-churn vanilla ice cream


syrup001

syrup002

Notes:

well, i do not know what i got wrong, but my syrup turned out a little runnier than i had thought it would be. Maybe i cooked it not as long as i should have, maybe the heat was “low” rather than “medium”, i really don’t know.

So i poured it into a glass bowl and put it 5 minutes or so in the microwave oven. You know, MW ovens allow water to evaporate. So i told myself that, if some water, through boiling, evaporated, the syrup would turn out thicker in the end. And it sort of worked. You know, when something doesn’t turn out the way it was supposed or i wanted it to, i take it personally, and i get angry, when i do not surrender. So see? never give up, you can (almost) always make up for kitchen disasters :) just stop, breath, count to 10, and look for a solution :D


happy baking people!


Make this syrup! it’s worth it! (but do not eat it all at once right? lol)


{personal note:

i’ve changed so much over the last months. Once i would say “i’m making this, for sure!”, this would be my usual comment to the recipes i saw on blogs. Now i rather prefer to say nothing, and just “act”. Less words, more concrete stuff. And then i just drop a comment to say “ehi i tried it!! come and have a look!” to the original author… i’m so proud of the cook-blogger i’ve become :D}

Wednesday, January 19, 2011

Recipe index – the savoury stuff

Vegetarian (more or less)


Bread

Lefse (Norwegian flatbread)

Savoy cabbage rolls

I had bought some savoy cabbage to make spring rolls (which btw turned out unexpectedly great). There was like more than a half left. “How am i going to use this? it’s A LOT! i am never gonna be able to use it all!” So i spent an evening on looking for recipes that sounded yummy. I chose this one, among others that, i told myself, i definitely had to try sooner or late. Well, in the end i would have found out two interesting things:

1. savoy cabbage is never as much as it looks like. in fact it had looked like i had so much of it left, and insted it was barely enough to make the recipe i had chosen!

2. well, just because you like something, Serena, it doesn’t have to be the same for the other people (sadly). You’ll see what i’m meaning by this later on.


image

In my humble opinion, these taste great, no matter what pests say


Ingredients:

makes 9 rolls


1 small savoy cabbage

10-12 slices of italian speck ham {learn more} or  something like that, see what you can find in your country

3 big potatoes, boiled (you either boil them unpeeled and then peel them once they’re done, or you can boil them already peeled, your choice)

grated Parmesan cheese {learn more}, a lot

1 egg

salt

oil

diced Emmental cheese {learn more}


Method:

get 8 big leaves from the cabbage (if leaves are small, count 2 small=1 big leaf);

slice the rest of the cabbage very thinly (like julienne strips); wash the strips under running water in the sink, with the help of a colander;

smash the boiled potatoes and place them into a pan along with the sliced cabbage, some oil, and allow to cook (best covered) on medium-low heat, until everything is well mixed and the cabbage is perfectly cooked (add a little water if necessary, if you see that the potato-cabbage mix is getting too dry or is sticking to the pan);

add salt and allow to cool thoroughly;

bring water to a boil in a large pot;

scald each leaf, one at a time, for only 1 minute;

after you take them out of the water place the leaves on a kitchen cloth, and allow to drain;

place the potato-cabbage mixture into a bowl, add the egg, a couple of handfuls of grated cheese, (some ground pepper and/or nutmeg if you like), a couple of speck ham slices in julienne strips, and blend well;

unfold one leaf at a time, place one slice of ham on it, and then some stuffing (see picture – i’ve now realized that i forgot to draw the speck ham slice, well i apologize ;))

{1. unfold; 2. place –speck slice and – stuffing onto the leaf; 3. fold the base of the leaf onto the stuffing; 4. fold the sides of the leaf towards the centre of the leaf, and start rolling from the bottom of the leaf towards the top, as you’d do when making spring rolls}

if the leaf is too small, just slightly overlap 2 leaves and pretend it’s one;

overlapped

make sure you roll really tight; i “hid” some little emmental dices into the potato stuffing;

slightly oil the bottom of a large rectangular baking pan, dust it well with grated cheese, place the rolls into the pan, pour a drizzle of oil over them and dust abundantly with grated cheese (i dusted with some before placing the pan into the oven, and i dusted another time halfway through the baking time, or 10 minutes before the baking time is up);

bake in a preheated oven at 425°F for about 30 minutes (i used a fan oven) on the lower shelf (you can put the pan on a much higher shelf when the time is almost up, to cook the surface au gratin);

serve while still warm.

image

Enjoy :)

---

i almost forgot to tell you.

There are 3 of us in my family.

One out of three happens to hate savoy cabbage, or this is what he said, of course after i spent one morning on preparing the rolls.

So well, it’s great to cook for people that don’t like the stuff you cook, and it’s even greater that i basically had to eat the whole pan by myself… i promise, i’ll ask next time, no need of surprises like this anymore.


i had found so many recipes i wished i could try, and now it all fell through, since nobody but me at home likes savoy cabbage. Too bad, ‘cause i like it :(

Sunday, January 16, 2011

Here’s the scientific evidence of what i was saying before

you do not have to own an ice cream machine to make a wonderful, yummy ice cream


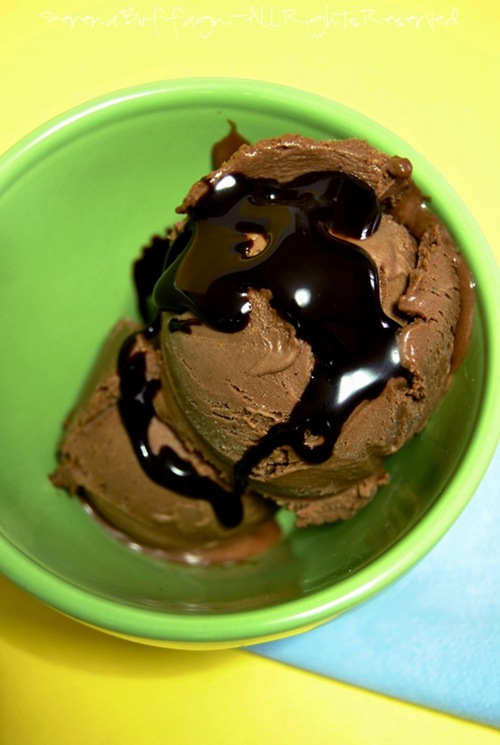
here is the most amazing, creamy, chocolate ice cream, made w/o any ice cream machine! don’t believe me? try it!

Ingredients:

it makes a huge batch, of course you can halve or quarter (as in the original) the recipe


adapted from here


1 quart (4 cups) of milk (better whole milk)

8 egg yolks

400 g  (14 oz.) dark chocolate (chopped up very finely) – i used one with 74% cocoa solids

1 1/2 cups + 1 tbsp granulated sugar

50 g (1/3 cup + 2 tbsp) unsweetened cocoa powder

vanilla extract

---

2 egg whites

4 heaping tbsp granulated sugar


Method:

beat egg yolks and sugar until fluffy and pale;

meanwhile bring milk to a boil, with the chopped chocolate and cocoa (stirring every now and then, so you allow chocolate to melt evenly);

gradually pour milk onto the beaten yolks and sugar, whisking constantly, until you get a nice and smooth mixture;

place over heat again, and allow to cook on low heat stirring constantly until the mixture coats the back of a spoon; do not allow it to boil or it will scrumble;

remove from heat and allow to cool completely (best overnight);

add the vanilla to the base;

start whipping the egg whites en bain marie (that’s a way to pasteurize them); gradually add the sugar and beat until stiff peaks form;

after about 10-15 minutes, when the bain marie water is hot, remove the bowl with the meringue from heat and continue beating egg whites until the bowl (and the meringue) has cooled down;

fold this into the base;

pour this mixture into a shallow, freezer safe container (better if it’s a steel bowl or so), and mix using a hand mixer every 45 minutes for the following 3 hours or so; (i personally “churn” it 2 times on the first day, and one last time after 24 hours after the second “churning”, and allow to set completely in the freezer – see also my notes here).

image

Saturday, January 15, 2011

No ice cream machine=no ice cream?

don’t panic, it doesn’t have to be this way

everybody, have they an ice cream machine or not, can make ice cream :)

there’s more work to do, and it needs a lot more time, but the ice cream turns out as good as any ice cream made using an ice cream machine ;)


basically what you need to do is:

get your base ready (better if it’s a custard base)

pour it into a shallow, freezer safe container

allow to stay there for 45 minutes

remove from freezer, place the mixture into a large bowl, and mix the base using a hand mixer or an immersion blender, the important thing is that you make sure that you add air to the mixture and break up ice crystals

pour everything back into the container, put into the freezer, allow to freeze for 45 minutes


do this for 4-5 times, then after you’ve poured the ice cream mixture into the container for the last time, put it into the freezer and allow to stay there until it’s set (4-6 hours) and then it’ll be ready to be scooped


i usually do not mix with the hand mixer after only 45 minutes, it’s to soon for me, the mixture would still be more or less liquid, it would be no use to churn at that stage

i pour the base into the container, place into the freezer, wait 12 hours or so (it has to be set, but at the same time it has to be soft enough to be mixed with the hand mixer), and mix; then wait another 12 hours, and mix; if necessary i do that again one more time

[or you can do this as you see that the ice cream is getting a little too hard and it’s not really creamy anymore (could be also after a week or so)]


many recipes read that ice cream can be kept in the freezer for up to 1 week; i’ve experienced leaving it in the freezer for way longer periods, and nothing wrong has ever happened (i mean, i’ve never had to run to the hospital so far :D) no seriously, i make ice cream just for me, and of course i can’t make 1 cup of mixture, all that work for a single scoop of ice cream? i make ice cream and keep it in the freezer, and eat it every now and then, over a period of some months, when i feel like eating some (usually i make recipes that serve 6-8)


i have also made up recipes that call for no churning at all. Just pour, allow to set, and eat. A lot easier, ain’t it?


read more

@ http://www.scoopadventures.com/home/how-to-make-ice-cream-without-an-ice-cream-maker.html

@ http://www.davidlebovitz.com/2007/07/making-ice-crea-1/


other useful resources

http://www.davidlebovitz.com/2008/07/how-to-make-ice-cream/

http://www.davidlebovitz.com/2007/07/tips-for-making-1/

i know, i’m getting boring


probably you’ll get the impression that i’m obsessed with only one thing

and i am, in some ways :D but i promise, i won’t be posting only ice cream recipes ;) though there will be a lot of those around here ;)


one of the most frequently asked questions whenever i post an ice cream recipe is: wonderful! must be yummy, but i don’t have an ice cream maker :( what can i do? ;(

beside the fact that all ice cream recipes can be made w/o an ice cream maker (there’s way more work to do, but one can make it), i have “invented” – it’s all a matter of playing around and adapting already existing stuff actually - (and will be inventing more) recipes which do not require an ice cream machine. Like the following. I do have an ice cream machine, but it’s not of the compressor freezer kind, mine has the bowl that has to be put in the freezer at least 13 hours or so before you churn your ice cream (see here, here, here, here), so either you basically plan when you’ll be making ice cream, or you have a huge freezer, and always keep the bowl there, so that it’s ready to use and well frozen any time you need it. When my parents complain because i have stuffed the freezer of anything that could possibly be use to stuff a freezer, i sometimes take the bowl of the ice cream machine out of the freezer. And here comes the necessity to have “No-churn” or “no ice cream machine” ice cream recipes.

gennut001

Ingredients:

serves 6


300 g nutella (hazelnut-cocoa spread)

220 g condensed milk

200 ml cream

2-4 tbsp milk


Method:

place en bain marie the nutella, just to get it softened;

remove from heat and fold in the condensed milk and as much milk as you’ll need to get a nice and smooth mixture (neither too thick or too runny);

put it in the MW for 30 secs, stirr well, get a nice and smooth and homogeneous mixture, and see if it needs another 15-30 secs in the MW; if it’s fine, allow to cool at room temperature (if it gets too thick add some other milk, but not too much);

once it has cooled down, fold in the whipped cream, gently, and then pour the mixture very gently into a proper box/container (that can be put in the freezer) – the layer of mixture shouldn’t be thicker than 2.5 inch;

place into the freeer for no less than 6 hours;

DONE. Don’t have to do anything more than this. Just go get a scoop and a bowl. It’s ready to be eaten. And it will always stay creamy.


;)

gennut002

gennut003

Thursday, January 13, 2011

The crazy woman hidden behind the screen

which would be me, btw :D

train2

I like to get to know something about the people whose blogs i read every day, so i’m telling you something about me.

You might not care about that, so if that’s the case, just skip this :D

brownav2

I’m a 23-year-old young woman whose greatest loves in life are her mum+dad+2 cats (who are just like sieblings to me), her pc’s (there’s my life in them), her kitchen chaos, her camera.

I’ve been baking since i was 14 years old. Before that, i loved “helping out” adults as they were at the stoves. My greatest inspiration were my grannie, who’s sadly no more here with me, to be helped out by me, and my mom’s brother, who loves to bake just like me (or should i say, “i love to bake, just like him”).

I love cooking in general, but baking… that’s what really makes me a happy woman.

Well i am in love with ice cream making, too.


(as 13th Jan 2011) i’m currently struggling to graduate (hopefully next march) at the Advanced School for Modern Languages for Interpreters and Translators in Forlì (Emilia-Romagna, Italy), studying English and German.


When i grow up, i wanna be a baker and a photographer. In my dreams.

In reality, still don’t know. I hope to find SOME job, at least, which nowadays isn’t that easy, and sure you can’t be that demanding. You have to be happy with what you get.

---

hidden mu copia

Wanna know more?

wanna have some chat, exchange advice, or whatever it is?

don’t hesitate, i’d love to hear from you


e-mail me at

buffagniserena [at] gmail [dot] com

---

Don’t steal, ask

All the pics here (unless otherwise credited) have been taken by be, and i own their copyright.

You must not use any of these for any purpose (be it commercial or not) without my explicit, written consent.

---

check out my other works

365 project

my photo lab

leisure (my past times’ blog)

Mint & chocolate ice cream (and a little ice cream lesson)


i live by this: when you do not find what you’re looking for, just invent it.

ok, i’m clearly  referring to recipes ;) {but i do invent some other things too, outside the kitchen, mostly when i’m required to write essays and i have no idea at all of what i should write about :D }


I wanted a mint & chocolate chunks/chips ice cream recipe. Not the white kind of this ice cream, the green kind, the one you get at the supermarket (at least, we get that kind here, in tubs).
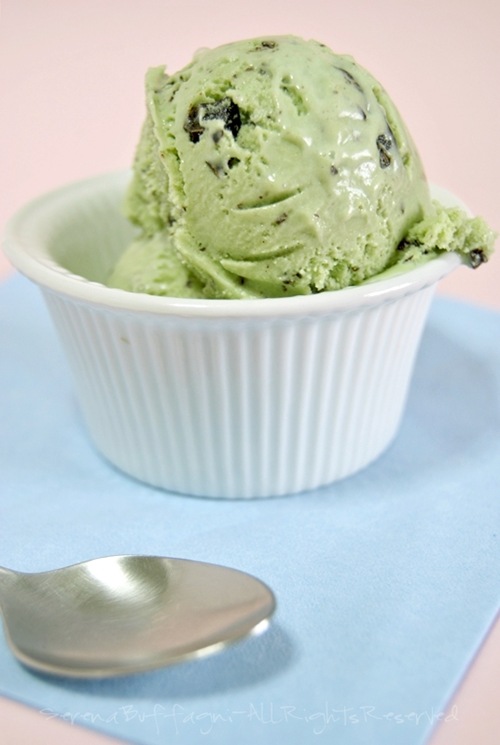
minticemine5 copia 3g

Most recipes i’ve checked call for mint, cream, milk, green food colouring, chocolate.

But I wanted a custard-base ice cream. I always want that kind of recipes for my ice creams. The reason why is quite simple. Home freezers are different from ice cream shops’. At home the temperature is like 50°F lower than the temperature of freezers in ice cream shops. As if this isn’t enough, they add chemical stuff to their ice cream, which prevents them to get as hard as a brick, once you leave them in a freezer for a while.

I do not have any chemical stuff i can use (and even if i had, i wouldn’t probably use it either), and my freezer is set at –11.2°F. So i have few options i can choose from.

1. Eggs: the more (i’m referring mstly to yolks) you use, the creamier your ice cream will be, and the longest it will stay that way in your freezer (first hand experienced. Even after months they are as soft as they were out of the machine); but do not use too many, of course, otherwise the ice cream will not set properly!

2. Alcohol and liqueurs: alcohol needs extremely low temperatures to freeze, further lower than water-based substances (water, milk, cream) {i.e. –173.4°F}; therefore, if you put a little alcohol in your ice cream, it won’t become like a block of concrete. (do not put too much of it, otherwise your ice cream won’t ever set!)

i mostly use vodka, which is more or less tasteless (can’t get real, pure alcohol – too expansive, it’s not worth it), or, whenever i can, i choose a liqueur that matches the taste that my ice cream has/will have (e.g.: limoncello for a lemon ice cream; mint liqueur for a mint ice cream)

3. Liquid glucose/glucose syrup: if you add some to your sugar amount, or substitute some sugar with the same amount of glucose, this will help it stay softer

4. Condensed milk: this doesn’t freezer. Try to put a jar in your freezer, and check it out after a couple of days. You’ll then be able to see that it still is creamy. A little less runny, but definitely not frozen. So if you put some (like 6 oz.) in your ice cream blend, that will keep it from becoming too hard.


I hadn’t planned it, but i now see that the order in which i’ve written these points down is exactly my preference order.

I want to stress the fact that i am no expert at all, nor am i a chemist or something like that. I just tell what i have experienced so far, in my humble kitchen.


So, what was i saying?

yes, eggs.

I had already tried a mint&chocolate chunks ice cream recipe (a.k.a. after eight ice cream), but it was, though delicious, eggless.

This time (and for times to come) i wanted a custard-based ice cream recipe. Green. Cause i had seen custard-based mint ice creams around, but all of them where white.

So, i made it up. Well it’s actually really easy to play around once you’ve understood how it works with ice creams, once you’ve gained a little experience in this field.

I had 3 egg yolks left from two batches of (so called) french macaron (still working on them). It’s time to try, Serena, i told myself.

I also had an idea in my mind, that had been tempting me for a while. I had some mint flavoured tea bags that i got from a friend as i visited her last december.

Minty, that must turn out so minty… but how…


There’s no harm in trying. Let’s get started.
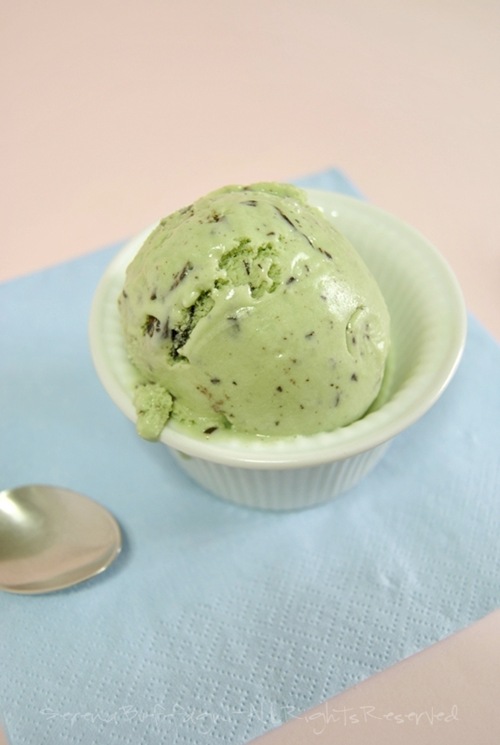
minticemine3 copiag   

Ingredients:

4 bags of mint flavoured tea (the best you can afford)

100-120 ml (1/2 cup) of milk (better if it’s whole milk)

---

3 yolks

100 g (1/2 cup) granulated sugar

100 ml (a scant 1/2 cup) of cream*

---

100 ml (a scant 1/2 cup) mint syrup (the kind you’d use for cocktails and granitas)

100 ml (a scant 1/2 cup) of cream*

2 tbsp mint liqueur (i had a homemade one which my dad had made – you can make your own)

4 drops or so of green food colouring (i even eventually got to find one type that doesn’t make my food look like it’s a GMO!)


50-70 g (1.5-2.5, depending on how much chocolate you want in your ice cream) dark chocolate, chopped by hand, as to get coarse chunks


*(the kind you use to whip, but NOT whipped, liquid)


Method:

bring milk to a boil (i used the MW), remove from heat (if you have used the stove) and sink the tea bags into the hot liquid, cover with a saucer, and allow to infuse for about ten minutes; once you’re sure they’ve given off all their flavour, squeeze the bags to allow all the milk they’ve absorbed to be released;

add the first 100 ml of cream, bring to a boil and remove from the heat;

meanwhile beat your egg yolks really well with the sugar, until soft, light, and fluffy;

gradually start to add the liquid mixture to the egg yolks, whisking constantly; begin by adding 2-3 tablespoons of the hot liquid;

once you’ve added all the milk and cream mixture, and you’ve got a nice and homogeneous blend, add the food colouring, dissolve well and put the mixture back on the stove, on low heat, stirring constantly until it coats the back of a spoon (about 4 to 8 minutes; do not allow it to boil, otherwise your mixture will scrumble!)

remove from heat, allow to chill thoroughly (best overnight, covered with aluminum foil);

add rest of the liquid cream, mint syrup, and liqueur; blend well;

pour the mixture into the ice cream machine and allow to churn until you see that the ice cream is ready (it’ll take it around 30 minutes); at this point pour in the chocolate chunks, allow to churn for as much time as it is necessary in order to have the chunks all well scattered though the ice cream (no more than a minute);

transfer to a proper container and place into the freezer, allowing it to set a bit (4 hours) before you get the perfect consistency (that can be scooped).
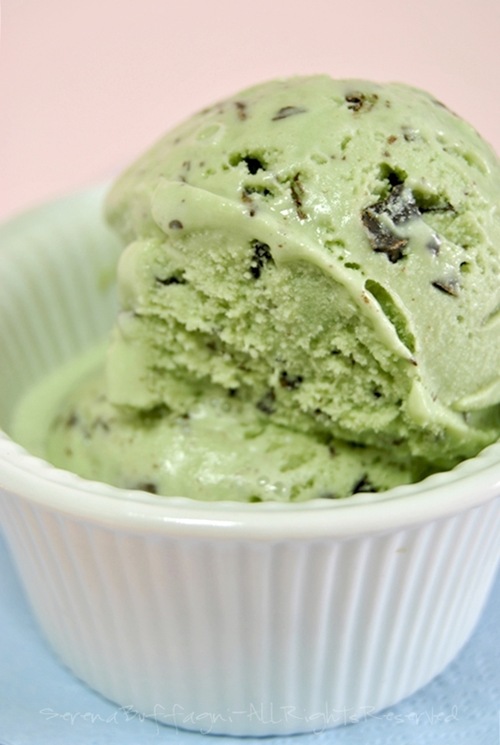
minticemine6 copiag

There’s no harm in trying.

In fact the ice cream turned out terrific.


Let’s try it this way:

I’d call this a “Triple mint ice cream”. If you want to make the “Quadruple mint” version, try to add to the mixture some pulverized mint candies (Altoids would work just fine, i guess, or any similar stuff you can find), and/or a hint of pure mint extract; i’m not sure but i suppose you can also try to add some crème de menthe


Wednesday, January 12, 2011

Recipe index – the sweet stuff

 
Ice creams, sorbets, frozen yogurt and other frozen treats
 
Chocolate ice cream – no ice cream machine required
 
 
Chocolate Sorbet – D. Lebovitz
 
No-churn vanilla ice cream - no ice cream machine required
 
Super simple Nutella ice cream – no ice cream machine required


Toppings, syrups, sauces

Chocolate syrup


Cakes

Chocolate mousse cake


Miscellaneous

Vanilla extract

And there he was, tempting her, for all this time…

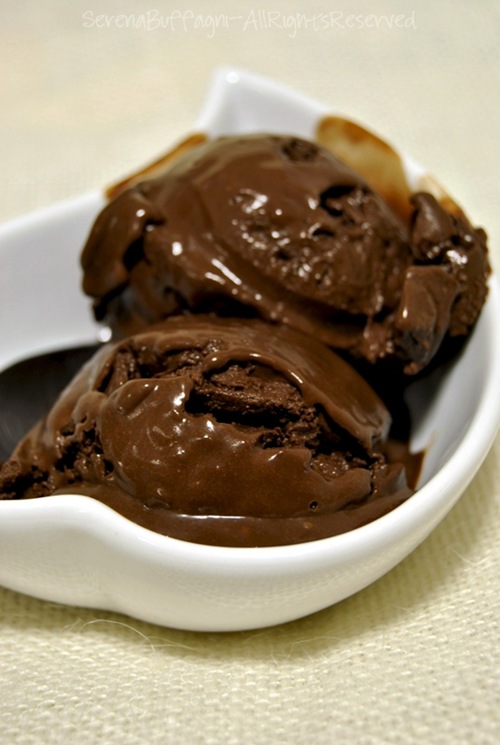
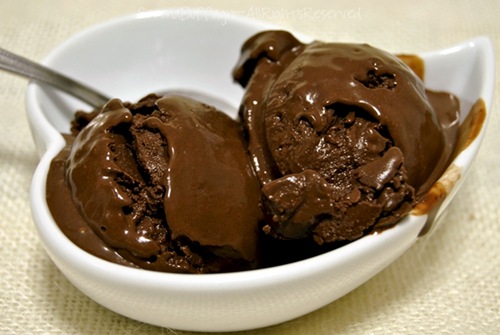
Until one day, finally the girl with the whisk gave in to the temptation. You win. And Chocolate Sorbet be it.


sorbet001003


I had wanted to try it for ages. One day I told myself “go to the kitchen and get started!”. And so did I. But wait, get started with what? what recipe will i be using? there are so many out there!

Why getting things more complicated, if you can have them the easier way?

For a start, therefore, I picked his recipe. His recipes are never wrong, his a master of not just ice creams, but frozen treats and sweets in general! So it must be a success, i thought.

And it was indeed.

I have to say, though, that what really convinced me were the words written by Smitten Kitchen and referring to that Sorbet. (

This stuff is better than brownies. It’s awesomer than the fudgiest chocolate ice cream. It makes chocolate truffles taste like they’re not trying hard enough. It could send that brandied ganache home with its tail between its legs.

A little bold, isn’t it? ;)

Well, the Sorbet was indeed delicious. Dunno if it really was better than brownies and truffles and chocolate ice cream (which i all love btw). But sure it was awesome :)

davessorbet

David Lebovitz’s Chocolate Sorbet – no milk, no cream, no eggs, and yet delicious (perfect for allergies and stuff)

adapted from Smitten Kitchen


sorbet002

Ingredients

yelds a quart (1 liter) – I quartered the ingredients so it served 1 [my adaptations in red]


2 1/4 cups (555 ml - 375+180) water [93+45 ml]
1 cup (200 g) sugar [40 g]
3/4 cup (80 g) unsweetened Dutch-process cocoa powder [regular unsweetened cocoa powder, 20 g]
Pinch of salt
6 ounces (170 g) bittersweet or semisweet chocolate, finely chopped [42 g]
1/2 teaspoon vanilla extract


Method:

In a large saucepan (do it: use a large one!) whisk together 1 1/2 cups (375 ml – 93 ml) of the water with the sugar, cocoa powder, and salt. Bring to a boil, whisking frequently. Let it boil, continuing to whisk, for 45 seconds.

Remove from the heat and stir in the chocolate until it’s melted, then stir in the vanilla extract and the remaining 3/4 cup (180 ml – 45 ml) water. Transfer the mixture to a blender and blend for 15 seconds (i didn’t do that). Chill the mixture thoroughly (i chilled it overnight, covered with aluminum foil) [If the mixture has become too thick to pour into your machine, whisk it vigorously to thin it out.], then freeze it in your ice cream maker according to the manufacturer’s instructions.

Allow to set for 4 hours in your freezer to get a nice and scoopable consistency.

 sorbet001 


Variations:

Mexican Chocolate: Use Ibarra chocolate and add 1 tsp cinnamon.
Espresso-Chocolate: Use coffee in place of water, add chopped chocolate-covered coffee beans.
Aztec Chocolate: Add 1/2 tsp red pepper.
Chocolate Mint: add a splash of Creme de Menthe or a drop of peppermint extract.
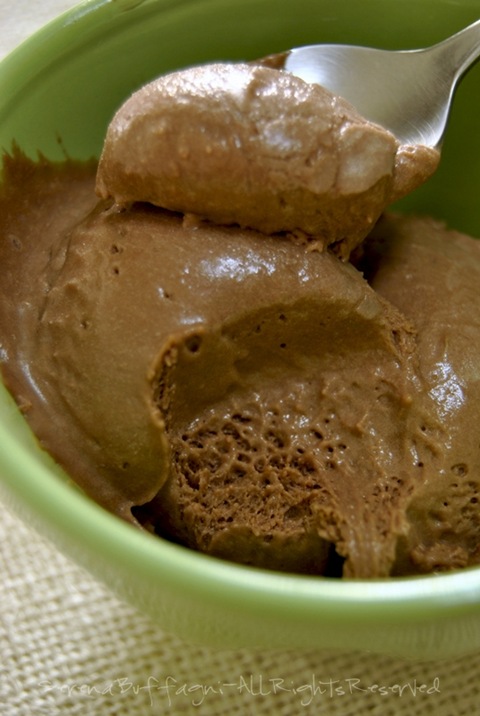
Chocolate Coconut: Use coconut milk in place of the water, add 1/2 tsp coconut extract.

Ready, set, go!

Another blog? Well, maybe someone would probably say so.

But the truth is, I've been wanting to open an English version of my Italian blog for ages. I even did it. But for some reasons, it didn't go well. Maybe i wasn't in the right mood. Maybe it was the idea that was wrong.

I had always thought about creating a "translation" of the blog, an exact copy, but in another language (it was even supposed to have the same title and design).

But now I've realized that this isn't what i should be doing. I do not want the English version to be a mere translation of the other blog. I want this newborn blog to have a life of its own, its own features. Maybe I have been affected by my academic studies in this, but I have eventually understood that since every language has its own features, as does every culture that speaks that language, so every blog should have its own features, which will be different depending on the language the blog is written in.

This is a new start.

I will be translating the recipes, of course, but i won't be using the same way to express the same content. Same content, then, but different container, adapting to the language I have chosen for that particular blog.

Just like when I think or I dream (yes, it happens to me, sometimes i have dreams in English). It's a different way to do these things from Italian.

Welcome everybody to My Salty&Sweet Kitchen :) (a.k.a. MSSK), a place where I share my savoury and sweet creations. But also thoughts, episodes of my life. A mix of everything :)

I'll be soon starting to post :) so follow me! stay tuned ;)

and yes, i expect you to give me advice, culinary but also regarding the language :D I'm no English expert, still learning ;) and i want to learn always more ;)

xoxo

S.