Showing posts with label cocoa powder. Show all posts

Friday, January 28, 2011

A bit late… but as they say… better late than never


A long time ago i saw a recipe. It called for tofu and soy milk. Despite these, is sounded absolutely delicious, and it also looked yummy. Wait a minute, i wrote “despite”… just because i knew i was never going to get those. Well MAYBE i could have, but i really doubt about it.

Anyway, i really wanted to try it but… how could i do that?

i came up with a substitution, i asked the blogger whose recipe i wished i was able to make, and yes, she reassured me and told me that the idea i had was not bad. I forgot to say thank you, that was too rude of me. I apologize Grace. I’m thanking you now :) a bit late but better late than never :)

My ice cream probably isn’t exactly like Grace’s, but it’s yummy :)


Praline Chocolate ice cream

adapted from here

(i had only 200 g of cheese so i reduced all the amounts to fit that)

pral2 copia

Ingredients:

serves 4-5


200 g philadelphia cream cheese (replacing 336 g silken tofu)

1/3 cup + 2 tbsp maple syrup

1/2 cup hazelnut praline paste (i had already some in the refrigerator-the funny thing is that i only had exactly 1/2 and luckily was enough)

1/2 cup (regular) milk

100 g chopped dark chocolate

vanillin

2 tbsp cocoa

2-3 tbsp vodka


   pral4 copia

Method:

put in a food processor the cream cheese, milk, maple syrup, praline paste, vanillin, cocoa, and blend until well combined and until all lumps disappear;

add the melted chocolate to the mixture, and vodka;

refrigerate if necessary, to get a very cold mixture;

pour into your ice cream machine and process according to the manifacturer’s instructions;

then transfer the ice cream to a freezer safe container, cover with the lid and place into the freezer, allowing it to set for at least 4 hours.


i added a little cocoa to make the colour more intense and darker, and vodka to allow the ice cream to keep soft in the freezer for a longer time, and to allow me to scoop it more easily when i take it out of the freezer.


go here to see how you can make your own hazelnut praline paste. I do the same as Grace, i just use the same amount of sugar and hazelnuts.

pral3 copia

pral5 copia

next time i’m making the peanut butter version ;D

Friday, January 21, 2011

DIH – Do It Homemade – it’s better, it’s cheaper… and way more fun!

Well i am a bit disappointed. Guess what is not fun at all? It’s not fun at all when, in addition to your regular breakfast, you eat two huge scoops of ice cream+syrup, just to be able to take some good pictures of the latter and… the pictures turn out to be horrible, and you get the feeling that you’re nearly going to puke because you’ve eaten too much.

Leaving aside all this (boring, for you, i’m sure) stuff, what i really mean to say is: the picture do not do justice to the subject of this post, this wonderful chocolate syrup.

In fact, i didn’t mean to post it now, not one bit. I really wanted to take a great pic of it first, one that could make you understand how good, delicious, yummy it is (i guess you’ll have to try it yourselves, at this poin), and only afterwards i would have posted the whole thing.

But i have to. Because i want to give thanks for this recipe to the blogger i “stole” the recipe from, and i had to have evidence of the fact that i had actually tried it, didn’t i? ;)


so, thanks Becky :) it tastes wonderful :)


syrup008

Chocolate syrup

adapted from here


makes almost 2 9-oz. jars (if i had known about that, i probably would have halved the recipe :) i eat that alone, and it’s a bit too much for me – anyway, Becky said it keeps more or less 1 month in the refrigerator – if you don’t eat the hole batch the day after the day you’ve made it – not recommended if you’e trying to stay fit :D like me)


Ingredients: (my adaptations in brackets)

1 cup unsweetened cocoa powder

1 1/2 cups granulated sugar (flavored with vanilla – just put a pod - whose seeds you’ve already used - into a jar, and cover with granulated sugar – allow the flavor of the vanilla pod to be transferred to the sugar – you actually forget about the jar for a month or two – make sure to shake the jar every now and then cause the sugar will tend to form one single block, due to humidity)

1 cup hot water

1/8 tsp salt

2 tbsp light corn syrup (it’s not available where i live, so i used the same amount of glucose syrup/liquid glucose instead – well i meant to use the same amount, but since i only had 1 1/2 tbsp, i used that)

1 tsp vanilla extract (1 sachet of vanillin – i know it’s not the same at all, but you have to use what you have – hopefully i’m making my own vanilla extract soon, keep your fingers crossed for me people ;) )


Mehod:

place the dry ingredients in a casserole, gradually add the water stirring constantly (i do so to prevent lumps to form);

add the syrup, bring to a boil over medium heat, stirring constantly, and cook for 3 minutes;

remove from heat, add vanilla, mix well, allow to cool completely and trasfer to a proper container (i used an empty bottle which once had contained store bought syrup).

Store in refrigerator, for up to a month.

(makes 1 3/4 cups syrup)


before:

syrup006

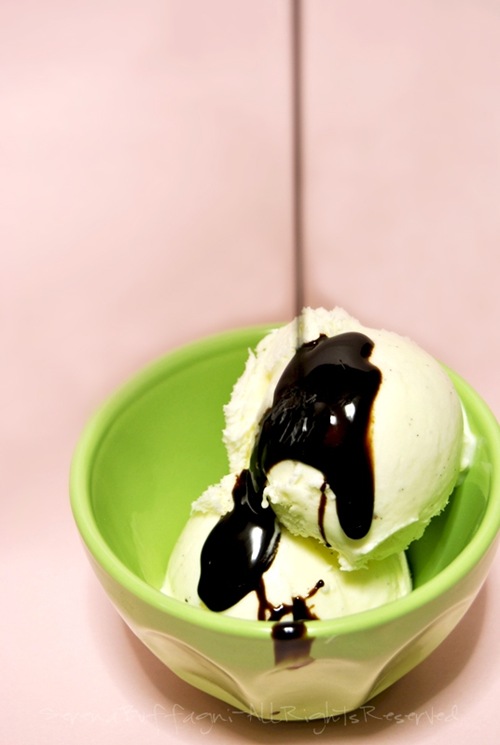
…and after the “chocolate syrup treatment”


syrup007 on my delicious, homemade, no-churn vanilla ice cream
 

syrup001

syrup002

Notes:

well, i do not know what i got wrong, but my syrup turned out a little runnier than i had thought it would be. Maybe i cooked it not as long as i should have, maybe the heat was “low” rather than “medium”, i really don’t know.

So i poured it into a glass bowl and put it 5 minutes or so in the microwave oven. You know, MW ovens allow water to evaporate. So i told myself that, if some water, through boiling, evaporated, the syrup would turn out thicker in the end. And it sort of worked. You know, when something doesn’t turn out the way it was supposed or i wanted it to, i take it personally, and i get angry, when i do not surrender. So see? never give up, you can (almost) always make up for kitchen disasters :) just stop, breath, count to 10, and look for a solution :D


happy baking people!


Make this syrup! it’s worth it! (but do not eat it all at once right? lol)


{personal note:

i’ve changed so much over the last months. Once i would say “i’m making this, for sure!”, this would be my usual comment to the recipes i saw on blogs. Now i rather prefer to say nothing, and just “act”. Less words, more concrete stuff. And then i just drop a comment to say “ehi i tried it!! come and have a look!” to the original author… i’m so proud of the cook-blogger i’ve become :D}

Sunday, January 16, 2011

Here’s the scientific evidence of what i was saying before

you do not have to own an ice cream machine to make a wonderful, yummy ice cream


here is the most amazing, creamy, chocolate ice cream, made w/o any ice cream machine! don’t believe me? try it!

Ingredients:

it makes a huge batch, of course you can halve or quarter (as in the original) the recipe


adapted from here


1 quart (4 cups) of milk (better whole milk)

8 egg yolks

400 g  (14 oz.) dark chocolate (chopped up very finely) – i used one with 74% cocoa solids

1 1/2 cups + 1 tbsp granulated sugar

50 g (1/3 cup + 2 tbsp) unsweetened cocoa powder

vanilla extract

---

2 egg whites

4 heaping tbsp granulated sugar


Method:

beat egg yolks and sugar until fluffy and pale;

meanwhile bring milk to a boil, with the chopped chocolate and cocoa (stirring every now and then, so you allow chocolate to melt evenly);

gradually pour milk onto the beaten yolks and sugar, whisking constantly, until you get a nice and smooth mixture;

place over heat again, and allow to cook on low heat stirring constantly until the mixture coats the back of a spoon; do not allow it to boil or it will scrumble;

remove from heat and allow to cool completely (best overnight);

add the vanilla to the base;

start whipping the egg whites en bain marie (that’s a way to pasteurize them); gradually add the sugar and beat until stiff peaks form;

after about 10-15 minutes, when the bain marie water is hot, remove the bowl with the meringue from heat and continue beating egg whites until the bowl (and the meringue) has cooled down;

fold this into the base;

pour this mixture into a shallow, freezer safe container (better if it’s a steel bowl or so), and mix using a hand mixer every 45 minutes for the following 3 hours or so; (i personally “churn” it 2 times on the first day, and one last time after 24 hours after the second “churning”, and allow to set completely in the freezer – see also my notes here).

image

Wednesday, January 12, 2011

And there he was, tempting her, for all this time…

Until one day, finally the girl with the whisk gave in to the temptation. You win. And Chocolate Sorbet be it.


sorbet001003


I had wanted to try it for ages. One day I told myself “go to the kitchen and get started!”. And so did I. But wait, get started with what? what recipe will i be using? there are so many out there!

Why getting things more complicated, if you can have them the easier way?

For a start, therefore, I picked his recipe. His recipes are never wrong, his a master of not just ice creams, but frozen treats and sweets in general! So it must be a success, i thought.

And it was indeed.

I have to say, though, that what really convinced me were the words written by Smitten Kitchen and referring to that Sorbet. (

This stuff is better than brownies. It’s awesomer than the fudgiest chocolate ice cream. It makes chocolate truffles taste like they’re not trying hard enough. It could send that brandied ganache home with its tail between its legs.

A little bold, isn’t it? ;)

Well, the Sorbet was indeed delicious. Dunno if it really was better than brownies and truffles and chocolate ice cream (which i all love btw). But sure it was awesome :)

davessorbet

David Lebovitz’s Chocolate Sorbet – no milk, no cream, no eggs, and yet delicious (perfect for allergies and stuff)

adapted from Smitten Kitchen


sorbet002

Ingredients

yelds a quart (1 liter) – I quartered the ingredients so it served 1 [my adaptations in red]


2 1/4 cups (555 ml - 375+180) water [93+45 ml]
1 cup (200 g) sugar [40 g]
3/4 cup (80 g) unsweetened Dutch-process cocoa powder [regular unsweetened cocoa powder, 20 g]
Pinch of salt
6 ounces (170 g) bittersweet or semisweet chocolate, finely chopped [42 g]
1/2 teaspoon vanilla extract


Method:

In a large saucepan (do it: use a large one!) whisk together 1 1/2 cups (375 ml – 93 ml) of the water with the sugar, cocoa powder, and salt. Bring to a boil, whisking frequently. Let it boil, continuing to whisk, for 45 seconds.

Remove from the heat and stir in the chocolate until it’s melted, then stir in the vanilla extract and the remaining 3/4 cup (180 ml – 45 ml) water. Transfer the mixture to a blender and blend for 15 seconds (i didn’t do that). Chill the mixture thoroughly (i chilled it overnight, covered with aluminum foil) [If the mixture has become too thick to pour into your machine, whisk it vigorously to thin it out.], then freeze it in your ice cream maker according to the manufacturer’s instructions.

Allow to set for 4 hours in your freezer to get a nice and scoopable consistency.

 sorbet001 


Variations:

Mexican Chocolate: Use Ibarra chocolate and add 1 tsp cinnamon.
Espresso-Chocolate: Use coffee in place of water, add chopped chocolate-covered coffee beans.
Aztec Chocolate: Add 1/2 tsp red pepper.
Chocolate Mint: add a splash of Creme de Menthe or a drop of peppermint extract.
Chocolate Coconut: Use coconut milk in place of the water, add 1/2 tsp coconut extract.